Author: hira

  • Best screen recorder – iTop Screen Recorder

    Best screen recorder – iTop Screen Recorder

    Screen recording software has become increasingly popular in recent years, with more and more people using it for various purposes such as creating tutorials, recording gameplay, or capturing online meetings. iTop Screen Recorder is a top-of-the-line screen recording software that stands out from the rest. In this article, we will explore why iTop Screen Recorder is the best screen recording software for your PC.

    User-Friendly Interface

    iTop Screen Recorder has a user-friendly interface that makes it easy for anyone to use. The software is designed with simplicity in mind, and it comes with a range of customizable recording options that allow you to adjust the recording settings according to your needs.

    High-Quality Recording

    One of the standout features of iTop Screen Recorder is its ability to record high-quality videos. The software supports recording in 1080p, 2K, and 4K resolutions, making it ideal for capturing detailed visuals. It also offers adjustable frame rates and bitrates, allowing you to record at the highest quality possible.

    Multi-Purpose Recording

    iTop Screen Recorder is a versatile software that can be used for various recording purposes. Whether you want to create YouTube videos, record gameplay, or capture online meetings, iTop Screen Recorder has got you covered. The software supports recording your PC screen and audio simultaneously, making it perfect for creating comprehensive recordings.

    Advanced Editing Tools

    In addition to its recording capabilities, iTop Screen Recorder also comes with a built-in video editor. The editor allows you to trim, cut, add text, and apply effects to your recorded videos. You can also add audio tracks and captions to enhance your recordings further.

    Free and Paid Versions

    Best screen recorder

    iTop Screen Recorder offers both a free and paid version of the software. The free version comes with limited features, while the paid version offers advanced features such as scheduled recording, batch recording, and no watermark. The paid version is reasonably priced and offers excellent value for money.

    Downloading and Installing iTop Screen Recorder

    To download iTop Screen Recorder, visit the official website at https://it.itopvpn.com/ and click on the “iTop Screen Recorder” option. You will be redirected to the download page, where you can choose the version that suits your operating system. After downloading the software, run the installation file and follow the on-screen instructions to install iTop Screen Recorder on your PC.

    Conclusion

    iTop Screen Recorder is the best screen recording software for your PC, thanks to its user-friendly interface, high-quality recording, advanced editing tools, and versatility. Whether you are a content creator, educator, or just looking to record your screen, iTop Screen Recorder is the perfect tool for the job. The software offers both a free and paid version, making it accessible to everyone. So why wait? Download iTop Screen Recorder today and start recording!

     

  • Top 5 Non-Contact Thermometers for Home and Professional Use

    Top 5 Non-Contact Thermometers for Home and Professional Use

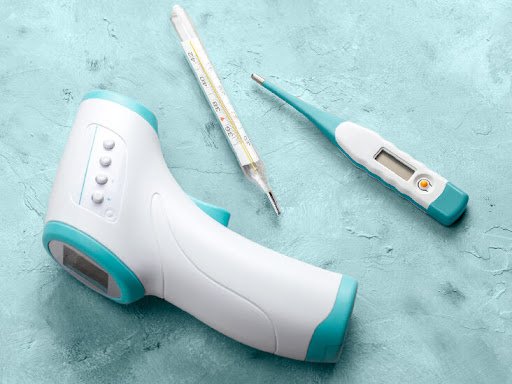
    Non-contact thermometers have become increasingly popular in recent years due to their ease of use, accuracy, and safety. They are ideal for measuring the temperature of infants, young children, and adults without any physical contact. In this article, we will review the top 5 non-contact thermometers for home and professional use.

    What is a Non-Contact Thermometer?

    A non-contact thermometer is a device that measures temperature without making direct contact with the person or object being measured. These thermometers use infrared technology to detect and measure the heat radiating from the object or person’s skin.

    Benefits of Using a Non-Contact Thermometer:

    There are several benefits of using a non-contact thermometer, including:

    • Safe and hygienic: Non-contact thermometers do not require physical contact with the person being measured, reducing the risk of spreading germs and viruses.
    • Quick and easy to use: Non-contact thermometers require minimal preparation and can take a reading in a matter of seconds.
    • Non-invasive: Non-contact thermometers are non-invasive, making them ideal for use on young children and people who may be sensitive to invasive procedures.
    • Accurate: Non-contact thermometers provide accurate readings, making them reliable for monitoring temperature changes.

    Top 5 Non-Contact Thermometers for Home and Professional Use:

    • iHealth No-Touch Forehead Thermometer:

    The iHealth No-Touch Forehead Thermometer is an FDA-approved device that provides accurate readings in just one second. It features a large LED display and can store up to 50 readings for easy tracking.

    • Fluke 62 MAX+ Infrared Thermometer:

    The Fluke 62 MAX+ Infrared Thermometer is a rugged, professional-grade thermometer that can measure temperatures from -30°C to 650°C. It features a backlit display and a rugged design that is built to withstand harsh environments.

    • Etekcity Lasergrip 800 Digital Infrared Thermometer:

    The Etekcity Lasergrip 800 Digital Infrared Thermometer is an affordable option for home use that provides accurate readings within one second. It features a backlit display and a laser pointer for easy targeting.

    • Braun NTF3000US Braun No Touch Plus Forehead Thermometer:

    The Braun NTF3000US Braun No Touch Plus Forehead Thermometer is a reliable and easy-to-use thermometer that provides accurate readings in two seconds. It features a color-coded fever guidance system and a large backlit display.

    • Extech IR200 Non-Contact Infrared Thermometer:

    The Extech IR200 Non-Contact Infrared Thermometer is a versatile device that can measure temperature from -32°C to 545°C. It features a laser pointer for easy targeting and a large backlit display for easy reading.

  • Activating Your DITO SIM Card: A Simple Guide to Get Connected

    Activating Your DITO SIM Card: A Simple Guide to Get Connected

    If you’ve got a DITO SIM card and want to activate it for connectivity, this article will help you through the process. Follow these straightforward steps to activate your DITO SIM card and enjoy seamless communication on the DITO network.

    Check Compatibility:

    Make sure your device is compatible with the DITO SIM card. Most unlocked smartphones and tablets should work fine. If you’re unsure, contact DITO’s customer support or visit their website for assistance.

    Inserting the SIM Card:

    Turn off your device and locate the SIM card slot. Use a SIM card ejector tool or a paperclip to gently open the tray. Remove the existing SIM card and carefully insert the DITO SIM card. Put the tray back into the device.

    Power On Your Device:

    Turn on your device and wait for it to recognize the DITO SIM card. This may take a moment, so be patient as the setup process completes.

    Network Registration:

    Your device should automatically connect to the DITO network. If not, go to your device’s settings and find the “Network” or “SIM & Network” section. Select “Network Operators” and choose the DITO network from the available options.

    Activating Your DITO SIM:

    Locate the DITO app on your device or download it from the official app store if you don’t have it. Open the app and follow the on-screen instructions to activate your SIM card. Provide accurate information when prompted, such as your name, address, and identification details.

    Verification Process:

    Complete the verification process as guided by the DITO app. This may involve entering a verification code received via SMS or following an email link. Follow the instructions carefully to complete the verification successfully.

    Waiting for Activation:

    Once you’ve completed the verification, your DITO SIM card activation request will be processed. It may take some time for activation to complete, so be patient. During this period, your device may display messages like “Limited Service” or “No Service.” Avoid tampering with the SIM card while it’s being activated.

    Confirmation of Activation:

    Once the activation process is finished, you’ll receive a confirmation message or notification on your device. Your DITO SIM card is now activated, and you can enjoy connectivity on the DITO network.

    FAQs (Frequently Asked Questions)

    Q1: How do I know if my device is compatible with a DITO SIM card?

    A: Most unlocked smartphones and tablets should work fine with a DITO SIM card. However, if you’re unsure, you can contact DITO’s customer support or visit their website for assistance.

    Q2: Can I activate my DITO SIM card without the DITO app?

    A: The DITO app is typically required to activate your SIM card. It guides you through the activation process and provides necessary instructions. Make sure to download the app from the official app store if you don’t have it.

    Q3: What information do I need to provide during the activation process?

    A: You’ll generally be asked to provide personal information such as your name, address, and identification details. It’s important to provide accurate information for a smooth activation.

    Q4: How long does it take to activate a DITO SIM card?

    A: Activation times may vary, but typically it takes a short period of time. During the activation process, your device may display messages like “Limited Service” or “No Service.” Be patient and avoid removing or tampering with the SIM card during this time.

    Q5: What should I do if my device doesn’t automatically connect to the DITO network?

    A: If your device doesn’t connect automatically, go to your device’s settings and find the “Network” or “SIM & Network” section. From there, select “Network Operators” and choose the DITO network from the available options.

    Q6: Can I use my DITO SIM card immediately after activation?

    A: Once the activation process is complete, you should be able to use your DITO SIM card and enjoy connectivity on the DITO network. Make sure you have a signal and network coverage in your area.

    Conclusion:

    Activating your DITO SIM card is a simple process that ensures you stay connected on the DITO network. By following these easy steps, you can insert the SIM card, register on the network, and complete the activation. Enjoy uninterrupted communication and network services with your fully activated DITO SIM card.

  • How to Set Up Floor-standing Speakers for Optimal Sound Quality

    How to Set Up Floor-standing Speakers for Optimal Sound Quality

    Floor-standing speakers are an excellent choice for home audio systems or home theaters, offering powerful and immersive sound. However, to achieve optimal sound quality, it’s important to set up these speakers correctly. In this article, we will provide a step-by-step guide to help you set up your floor-standing speakers for the best possible sound.

    Choose the Right Location:

    The first step in setting up your floor-standing speakers is to choose the right location for them. Look for a location that is free from obstructions and is at least several feet away from any walls or corners. Placing the speakers too close to a wall can result in a boomy or muffled sound.

    Position the Speakers Correctly: 

    Once you have chosen the location for your speakers, position them correctly. The tweeters (smaller speakers) should be at ear level when seated, and the speakers should be angled toward the listening area. Use speaker stands or isolation pads to help position the speakers correctly.

    Connect the Speakers to Your Amplifier: 

    Next, connect the speakers to your amplifier or receiver. Make sure to use high-quality speaker wire and connect the positive (+) and negative (-) terminals correctly.

    Adjust the Bass and Treble: 

    Most amplifiers or receivers have tone controls that allow you to adjust the bass and treble levels. Adjust these levels to your personal preference, but be careful not to overdo it, as too much bass or treble can result in distorted sound.

    Balance the Sound: 

    To ensure that the sound is balanced between your left and right speakers, use a sound meter or an app on your smartphone to measure the sound level from each speaker. Adjust the volume on each speaker until they are outputting sound at the same level.

    Add Room Treatments: 

    Finally, consider adding room treatments like acoustic panels or bass traps to help absorb sound reflections and reduce standing waves. This can help to improve the clarity and accuracy of the sound.

    In conclusion, setting up floor-standing speakers correctly is essential for achieving optimal sound quality. By choosing the right location, positioning the speakers correctly, connecting them to your amplifier, adjusting the bass and treble, balancing the sound, and adding room treatments, you can ensure that your floor-standing speakers are delivering the best possible sound.

  • Pre-Operation Maintenance Checklist for Generators

    Pre-Operation Maintenance Checklist for Generators

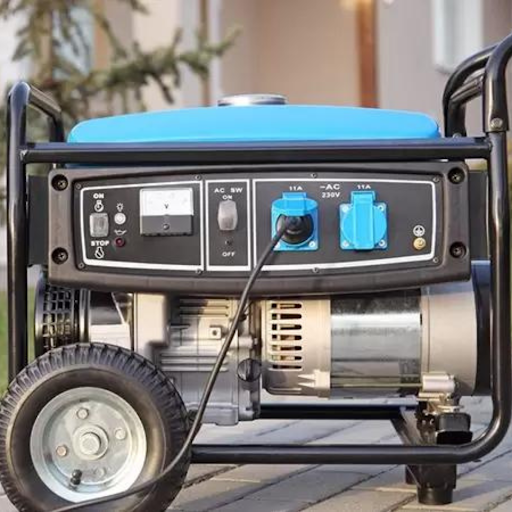
    Generators are essential for providing backup power during outages, emergencies, and in remote locations. However, a generator can only function at its optimal level if it is well-maintained. Pre-operation maintenance is a crucial aspect of generator maintenance that can help ensure the smooth functioning of the generator and extend its life.

    Here’s a pre-operation maintenance checklist for generators that can help you ensure your generator is always ready when you need it.

    Check Fuel Level: 

    Make sure your generator has an adequate amount of fuel. It’s best to use fresh fuel to avoid any clogging in the carburetor or fuel lines.

    Check Oil Level: 

    Generators require oil to lubricate the engine. Check the oil level and make sure it is at the recommended level. Dirty or low oil can cause engine damage and reduce performance.

    Check the Battery: 

    The battery is essential for starting the generator. Check the battery terminals for corrosion and ensure that the battery is fully charged.

    Inspect the Air Filter: 

    The air filter prevents dirt and debris from entering the engine. A dirty air filter can reduce the generator’s performance and cause engine damage. Check and clean the air filter regularly.

    Test Run the Generator: 

    Run the generator for a few minutes to ensure it starts and runs smoothly. If the generator produces unusual noise or vibration, it may require repairs.

    Check the Circuit Breakers: 

    Check the circuit breakers to ensure they are in the proper position. Faulty breakers can cause electrical damage or fires.

    Verify Power Output: 

    Verify that the generator is producing the correct power output. Use a multimeter to check the voltage, amperage, and frequency.

    Visit our site: https://gas-and-diesel-engine-equipment-guide.com/

    By following this pre-operation maintenance checklist for generators, you can ensure that your generator is always ready to provide backup power when you need it. It’s essential to perform regular maintenance to prevent generator failure and extend its lifespan.

    If you’re unsure about performing generator maintenance, it’s best to hire a professional. A qualified technician can perform routine maintenance and diagnose any potential problems before they become costly repairs.

  • Why is Worth Doing Guest Posting in 2023?

    Why is Worth Doing Guest Posting in 2023?

    Guest posting is the practice of writing and publishing an article or blog post on someone else’s website or blog. The purpose of guest posting is to reach a new audience, establish oneself as an authority in a particular niche, and to improve the visibility and credibility of a website or brand.

    Guest posting typically involves pitching a technology guest post idea to a website or blog owner, and if accepted, writing the article and submitting it for publication. Guest posts should be high-quality, informative, and relevant to the audience of the host website or blog. They should also contain a link back to the author’s website or social media profiles to help increase visibility and drive traffic.

    Guest posting can be a valuable strategy for businesses and individuals looking to build their brand and reach new audiences. It can also be beneficial for the host website or blog, as it provides them with fresh content and can help to establish them as a thought leader in their niche.

    However, it’s important to note that guest posting should be done ethically and transparently. Google has cracked down on guest posting as a spammy SEO tactic, so it’s important to only guest post on high-quality, reputable websites and to ensure that the content is valuable and not simply a way to manipulate search engine rankings.

    Ways Guest Posting Can Help Your Business

    Guest posting can be a powerful tool for businesses looking to establish themselves as thought leaders in their industry and to reach new audiences. Here are some of the ways that guest posting can help your business:

    Increase brand visibility:

     By guest posting on relevant websites or blogs, you can increase your brand’s visibility and reach new audiences who may not have otherwise been exposed to your brand.

    Build credibility and authority: 

    Guest posting can help to establish you and your brand as experts in your field. By providing valuable content and insights, you can build credibility and authority with your target audience.

    Drive traffic to your website: 

    Guest posts typically include a link back to your website, which can help to drive traffic and improve your website’s search engine rankings.

    Expand your network:

     Guest posting can also help you to expand your professional network and build relationships with other thought leaders and influencers in your industry.

    Generate leads and sales: 

    By providing valuable content to your target audience, you can attract potential customers and generate leads and sales for your business.

    Overall, guest posting can be an effective way to build your brand, establish your authority, and reach new audiences. However, it’s important to approach guest posting ethically and to focus on providing value to the host website or blog’s audience, rather than solely promoting your brand.

     Increase Online Presence With Guest Posting

    Here are some steps you can take to increase your online presence with guest posting:

    Identify relevant websites or blogs: 

    The first step is to identify websites or blogs that are relevant to your industry or niche. Look for websites or blogs that have a similar target audience to yours and that publish content related to your area of expertise.

    Research the website or blog: 

    Once you’ve identified potential websites or blogs, research them thoroughly to get a sense of their audience, content, and style. Make sure that the website or blog is reputable and has a strong online presence.

    Develop a pitch: 

    Once you’ve identified a website or blog that you would like to contribute to, develop a pitch that highlights your expertise and the value that you can provide to their audience. Your pitch should be tailored to the website or blog and should demonstrate that you understand their audience and their content.

    Write high-quality content:

     Once your pitch has been accepted, focus on creating high-quality content that provides value to the website or blog’s audience. Your content should be well-researched, informative, and engaging.

    Promote your guest post:

     Once your guest post has been published, promote it on your own website and social media channels to increase its visibility. This will help to drive traffic back to the website or blog and will also help to increase your own online presence.

    Repeat the process:

     Once you’ve successfully published a technology or digital marketing guest post, repeat the process with other relevant websites or blogs. Over time, this will help to increase your online presence and establish you as a thought leader in your industry.

  • Setting Up Your Floor-standing Speakers for Optimal Audio Performance

    Setting Up Your Floor-standing Speakers for Optimal Audio Performance

    Introduction

    • Briefly introduce the topic of setting up floor-standing speakers for optimal audio performance.
    • Explain the importance of proper setup to achieve the best possible sound quality.
    • Preview the steps that will be covered in the article.

    Room Acoustics

    • Discuss the importance of room acoustics in determining sound quality.
    • Explain how room size, shape, and furnishings can impact sound quality.
    • Provide tips on optimizing room acoustics for floor-standing speakers.

    Speaker Placement

    • Discuss the importance of speaker placement in achieving optimal audio performance.
    • Explain how speaker distance, height, and angle can impact sound quality.
    • Provide tips on optimizing speaker placement for floor-standing speakers.
    • They can fit anywhere in the room.

    Subwoofer Integration

    • Discuss the role of subwoofers in enhancing audio performance.
    • Explain how to integrate subwoofers with floor-standing speakers for optimal sound quality.
    • Provide tips on optimizing subwoofer placement for floor-standing speakers.

    Amplifier and Receiver Settings

    • Discuss the importance of amplifier and receiver settings in achieving optimal audio performance.
    • Explain how to adjust settings such as volume, crossover, and equalization.
    • Provide tips on optimizing amplifier and receiver settings for floor-standing speakers.

    Speaker Cable and Interconnects

    • Discuss the importance of speaker cables and interconnects in achieving optimal audio performance.
    • Explain how to choose the right cables and interconnects for floor-standing speakers.
    • Provide tips on optimizing cable and interconnect placement for floor-standing speakers.

    Listening Test

    • Discuss the importance of a listening test in assessing audio performance.
    • Explain how to conduct a listening test for floor-standing speakers.
    • Provide tips on optimizing the listening environment for floor-standing speakers.

    Conclusion

    • Summarize the key points covered in the article.
    • Emphasize the importance of proper setup for achieving optimal audio performance with floor-standing speakers.
    • Encourage readers to implement the tips provided to enhance their home audio experience.
    • It’s a really good speaker that can really help in listening to better sound.
  • Enhancing Your RC Car’s Steering for More Precise Control

    Enhancing Your RC Car’s Steering for More Precise Control

    It will explain how you can enhance your RC car’s steering for more precise control.

    • Briefly introduce the topic of enhancing your RC car’s steering for more precise control.
    • Explain why precise steering is important for RC car performance and handling.
    • Preview the tips and techniques that will be covered in the article.

    Check Your Steering Components

    • Explain how to check the steering components of your RC car to ensure they are in good condition.
    • Discuss common steering issues and how to diagnose them.
    • Provide tips for maintaining and repairing your RC car’s steering system.

    Adjust Your Steering Servo

    • Explain how to adjust the steering servo on your RC car.
    • Provide step-by-step instructions for adjusting the servo to improve steering response.
    • Discuss how to fine-tune the steering servo to achieve the desired level of control.

    Upgrade Your Steering System

    • Discuss the benefits of upgrading your RC car modifications system.
    • Explain different types of steering upgrades, such as ball bearings and tie rods.
    • Provide tips for selecting and installing the right steering upgrades for your RC car.

    Fine-Tune Your Driving Technique

    • Discuss how your driving technique can affect your RC car’s steering.
    • Provide tips for improving your driving technique to achieve more precise steering control.
    • Discuss the importance of practice and experimentation in honing your driving skills.

    Conclusion

    • Summarize the key points covered in the article.
    • Emphasize the importance of precise steering for RC car performance and handling.
    • Encourage readers to implement the tips and techniques covered in the article to enhance their RC car’s steering control.
  • How to Download YouTube Videos Using YT5S

    How to Download YouTube Videos Using YT5S

    YouTube is the most popular video-sharing platform that has a plethora of content to offer. While the platform has an offline feature, which allows users to download videos, it comes with certain limitations. This is where third-party YouTube video downloaders come in handy, and one such popular option is YT5S. Here is a step-by-step guide on how to download YouTube videos using YT5S.

    Step 1: Copy the YouTube video URL

    To download a video from YouTube using YT5S, you need to copy its URL. You can do this by opening the video on YouTube and then selecting the URL from the address bar of your browser. Alternatively, you can right-click on the video and select “Copy video URL.”

    Step 2: Go to the YT5S website

    Once you have copied the YouTube video URL, open a new tab in your browser and go to the YT5S website. You can search for the website on Google or enter the URL “https://yt5s.com/” directly in the browser’s address bar.

    Step 3: Paste the video URL on YT5S

    On the YT5S website, you will find a search bar where you can paste the copied YouTube video URL. Click on the search icon next to the search bar or press “Enter” on your keyboard to initiate the search.

    Step 4: Select the download format

    After YT5S has processed the video URL, it will display different download formats and resolutions. You can choose the format and resolution that you want to download by clicking on the corresponding button. YT5S offers various download options such as MP4, MP3, AVI, and more.

    Step 5: Download the video

    Once you have selected the download format, click on the “Download” button to initiate the download process. YT5S will start downloading the YouTube video in the format you selected.

    Tips for using YT5S:

    1. Make sure that you have a stable internet connection while using YT5S to download YouTube videos. Slow or interrupted internet connection can result in incomplete downloads.
    2. Before downloading a video, make sure that you have the necessary permissions to download it. Some videos on YouTube are protected by copyright laws and may not be available for download.
    3. Always be cautious when downloading videos from unknown sources, as they may contain viruses or malware that can harm your device.
    4. YT5S offers a browser extension that you can install to download YouTube videos more conveniently. The browser extension adds a download button on YouTube videos, making it easier to download them without having to copy the URL. Download on any device like razer blade 15 2018 h2 etc.

    Conclusion:

    Downloading YouTube videos using YT5S is a simple and easy process. By following the steps outlined in this article, you can download your favorite YouTube videos and watch them offline, anytime, anywhere. However, it is important to remember that downloading videos from YouTube without proper permissions may violate copyright laws. So, always be cautious and make sure that you have the necessary permissions before downloading a video.

  • Dealing with Roadside Emergencies

    Dealing with Roadside Emergencies

    A roadside emergency can happen to anyone at any time, and it’s important to be prepared for these situations. Whether it’s a flat tire, a dead battery, or something more serious, knowing how to handle a roadside emergency can help keep you and your passengers safe. Here are some tips on how to deal with a roadside emergency.

    Pull over to a safe location

    Pulling over to a safe location is the first and most important step in dealing with a roadside emergency. You should try to find a location that’s away from traffic and is well-lit if you’re stranded at night. If you’re on a highway, try to find an exit ramp, a rest stop, or a road shoulder where you can safely pull over. If you’re on a city street, pull over to the side of the road as far as possible. Once you’re in a safe location, you can assess the situation and determine the next steps.

    Be prepared

    Being prepared for a roadside emergency can make all the difference in staying safe and reducing stress. You should keep a spare tire, a jack, and a tire iron in your car at all times, and make sure you know how to change a tire. Another thing you should do is find experienced emergency auto electrical professionals because they can help you get back on the road and find your way home. You should also keep a first aid kit, a flashlight, and some basic tools in your car, such as a screwdriver, pliers, and duct tape.

    Turn on your hazard lights

    Turning on your hazard lights is essential in alerting other drivers that you’re experiencing an issue. It’s important to turn them on as soon as you pull over to help prevent accidents and ensure your safety. Hazard lights also help emergency services find you quickly, especially in low-visibility conditions such as heavy rain, fog, or snow. Remember to turn them off once you’ve resumed driving.

    Assess the situation

    Once you’ve pulled over to a safe location and turned on your hazard lights, it’s time to assess the situation. Try to determine the severity of the problem and whether you can handle it yourself or if you need help. Some issues like a flat tire, a dead battery, or a small engine problem can be fixed easily with some basic tools and knowledge. However, if the issue is more serious, such as a major engine malfunction or a car fire, it’s best to call for help immediately.

    Call for help

    If you’re unable to handle the situation on your own, it’s essential to call for help. Depending on the issue, you may need to call a tow truck, a mechanic, or even emergency services. If you have a roadside assistance service, such as AAA, make sure to call them right away. Remember to give them your location, the issue you’re facing, and any other relevant information that can help them assist you quickly.

    Stay in your car

    If you’re waiting for help to arrive, it’s essential to stay in your car with your seatbelt fastened. This will help keep you safe in case of an accident and make it easier for rescuers to find you. You should also keep your windows up and your doors locked to prevent strangers from approaching you.

    Stay visible

    If you’re waiting for help to arrive at night or in low-visibility conditions, it’s important to make your car more visible. You can turn on your interior lights so that you’re easier to see, especially if you’re parked in a dark area. You can also use flares or reflective triangles to make your car more visible to other drivers.

    Stay calm

    Dealing with a roadside emergency can be stressful, but it’s important to stay calm. Take a few deep breaths and try to stay focused on the task at hand. Panicking or getting upset won’t solve the problem and may even make the situation worse. Stay positive and know that help is on the way. You can also listen to some music or read a book to distract yourself and pass the time while waiting for assistance.

    Learn from the experience

    Dealing with a roadside emergency can be a learning experience. After the situation has been resolved, take some time to reflect on what happened and how you can prevent it from happening again. This may include getting your car regularly serviced, learning some basic car maintenance skills, or being more prepared for emergencies. Remember that being prepared and staying calm can make all the difference in staying safe and reducing stress during a roadside emergency.


    A roadside emergency can happen to anyone at any time. It’s important to stay calm, be prepared, and follow the appropriate steps to ensure your safety and get the help you need.  Read More Click Here: Music.